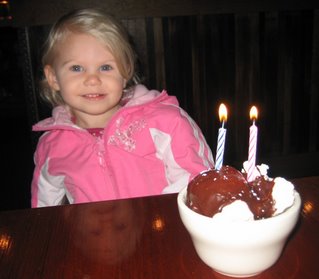
Showing posts with label Birthdays. Show all posts

Thursday, December 06, 2012

Happy Birthday to the Best Husband a Girl Can Have

This guy...

 
became this guy.
 

And today is is his birthday! Happy Birthday Brett!

Brett, as one of your gifts this year, I will refrain from publicizing your age. (And therefore, I will not publicize the "ballpark" of my own either.)

I know that today won't be quite the celebration that we'd like to have (dang law school!), but I hope you manage to have a good day nevertheless. I'm very proud of all of your hard work -- both in your studies and here at home. I love you!

And of course, I must give a shout-out to my mother-in-law Bonnie who did the hard work of bringing him into the world and was so wonderful to teach him how to sweep at an early age. Thank you! I am now reaping the benefits of a husband who pitches in with the house work! My in-laws did a wonderful job raising such a fantastic man. I'm thankful for them and the role that they have played in our lives.

Happy birthday to the best husband a girl like me could have!

Thursday, June 21, 2012

Birthday Cake Round-Up

Rapunzel "Tangled" Cake

Today at Life as Mom, it's the Birthday Cake Round Up. Honestly, the vast majority of my cake decorating experience is either self-taught or comes from FishMama. But, I've always wanted to take a cake decorating class. My friend Caroline and I are planning on taking a class together sometime this summer. I can't wait!

Over the years, I've still managed to make some cakes to impress my girls. After all, that is usually the point. If they're happy with their birthday cakes, I'm one happy momma. It is so much more affordable to make your own cake, and oftentimes it tastes even better than the store bought version. I almost always keep it simple with a boxed cake mix and then make it special by adding my own homemade buttercream frosting and a few decorative touches.

I've pulled some links from the archives of some of our favorite birthday cakes. Each link contains  instructions on how to recreate the cake. Enjoy!


Sleeping Beauty Cake (a variation of this Tangled Cake from FishMama)

 Barbie and The Three Musketeers Cake

 Fancy Nancy Explorer Extraordinaire

Thursday, February 02, 2012

L and E Birthday Cakes 2012

Both of my girlies celebrate their birthdays in January, so we eat a lot of cake at the beginning of the year. Now, I am NOT a professional baker. I usually try to keep things simple but try to add touches that make the cakes special for them. I always use a simple box mix (of the birthday girl's preferred flavor), and we usually try to bake it together if time allows. However, I usually do the decorating on my own. Since I don't like canned frosting, I make this 5-Minute Buttercream Frosting. It takes just a few minutes, and it tastes sooooo good! Then, I make the frosting pretty by adding food coloring. (I prefer to use Wilton Food Coloring.) For decorations, I get sparkly number candles from Target and print out character images from the internet to use as toppers. I just print the images on cardstock, cut out and tape some toothpicks to the back. It's simple but the girls think it is so cool.

They always get to choose a theme, and I do my best to make it happen. In the past I've made cakes to go along with the following themes: Castle, Fancy Nancy Explorer Extraordinaire, TinkerBell, and Sleeping Beauty. This year, I'm adding Barbie & The Three Musketeers and Rapunzel to the list.


Lucie requested a Barbie and the Three Musketeers cake for her birthday. I recreated this Barbie Wallpaper image on a simple round layer cake. I printed the image on cardstock and cut out Barbie, the Three Musketeers and the castle separately to make cake toppers. Then, I created a "road" out of graham cracker crumbs for the road.


Ella requested a Rapunzel (aka Tangled) cake for her birthday. Originally, I wanted to make a lantern cake, but then reality set in. I just didn't have time to create something that elaborate. So, I decided to recreate the gondola scene. I used this image of Flynn, Rapunzel and Maximus in the gondola and this image of the kingdom island for the background. However, I'm a bit of a stickler for authenticity. Maximus was not in the gondola, so I cut him out. I made the water out of blue and white frosting and added some graham cracker crumbs around the island in the background.

The cakes were easy enough to make, but I still managed to get one of the best compliments from Ella: "You're the best mom in the world!"

Tuesday, February 01, 2011

Tinker Bell & Terence Birthday Cake


Once I got the inspiration for Ella's birthday cake from this Fairy House Ornament craft, I was really excited to make it. Originally, I planned on making a 4-layer tower and using one of the Tinker Bell "Polly Pocket" style figurines that we already had. However, once I found a set of tiny Tinker Bell & Terence figurines at Walmart, I decided to make two shorter fairy houses. Logistically, I just figured it would be easier to serve up a 2-layer cake than a 4-layer. Since I used mini-cake pans, I ended up making 12 cupcakes to supplement. The guests got to choose if they wanted a piece of the fairy house or a "mushroom" cupcake. It took me at least an hour to decorate it, but it was totally worth it!Here's how I did it:

What you need:
What to do:
  1. Divide the cake batter between the greased mini-pans and 12 lined cupcake tins . Bake according to package directions. Since the cakes are different sizes, start at the baking time for the cupcakes and keep checking the mini cakes with a toothpick until done. Remove from pans and cool completely.
  2. Place two mini cakes on the platter, spread on some frosting, and then top with the other two mini cakes. Frost with a crumb coat and place in the fridge to harden.
  3. Put a portion of frosting in a separate bowl and tint to your preferred shade of green. I overdid it and made it a bit too leafy green. I added some dark chocolate cocoa powder to muddy it up a bit. Frost the two cakes. Add some green sprinkles for texture. Place in the fridge to harden.
  4. Put a small portion of frosting in a separate bowl and tint yellow. Spread a circle of yellow frosting on the front of the cakes to make the "doors." You can use a pastry bag or ziploc with the corner snipped off to make it easier. Add some sort of candy to make the doorknob. (I used a snowflake sprinkle.)
  5. Add some small white "windows" to the sides of the house. Place in the fridge to harden.
  6. Put a portion of frosting in a separate bowl and tint dark brown with either dark cocoa powder or brown paste food coloring. Put in a pastry bag with a star tip and pipe around the door, the windows and add some "twig" beams. Place in the fridge to harden.
  7. Put a portion of frosting in a separate bowl and tint red. Frost the cupcakes with red. Place in the fridge to harden a bit. Then add some white circles on top of the red to make the cupcakes resemble mushrooms.
  8. On the serving platter, coat the empty spaces with a thin coat of frosting and sprinkle with graham cracker crumbs. Put some frosting on the bottom of the figurines and a "mushroom" and press into place. Insert a number candle into the mushroom. Top the fairy houses with the cardstock roofs.

Monday, January 31, 2011

Ella's 6th Birthday in Pixie Hollow

I did it. I survived "Birthday Season" at our house. And I must say, we went out with quite a bang. On Saturday, Ella celebrated her 6th Birthday with family, some longtime friends and a couple of her classmates. The theme was Tinker Bell / Pixie Hollow...and I would just like to say "Thank You" to Disney for their help. Pretty much all of my inspiration came straight from the Disney Fairies website. I took some of their ideas, tweaked them and used them to fill in my little "format" that I've come up with for our birthday parties. I like to have a craft, a game, gifts, cake and a pinata.

We began the party with some free time. In the past couple of years, I've learned that it is best to begin parties that way. Not everyone shows up on time plus Ella really loves to show her room and belonging to her friends. So, it was extremely loud in our house for awhile. Ella has an exuberant personality...and attracts friends with the same tendencies.

After about 30 minutes of loud chaos, it was time to calm things down and work on a craft for a bit. The Disney Fairies website had a very cute Rosetta Frame Craft. (You can catch a glimpse of the frames on the mantel in the photo above.) The pdf includes instructions, a template and some printable "clovers" to decorate the frame. I also printed some extra decorations from the Disney Fairies website so the kids would have more options. I ended up resizing and printing birds and berries from the First Flight Garland pdf. Last week, we collected a bagful of sticks at a local park, and I used them to build the frames ahead of time. All the kids needed was a Q-tip, some glue and decorations to create their masterpieces. When they had finished putting on the paper decorations, they had the choice of adding glitter to it as well. I had them put the glue on the frame and place the frame in a shallow bucket before shaking on the glitter. (The bucket is KEY if you want to contain the glitter!) The finished frames were soooooo cute! We also made sure that Ella took a photo with each friend, and we'll be mailing them a photo to put in their frame.

For the game, we had a variation of "Pin the Tail on the Donkey." I created a huge tree on one of our walls to resemble the Home Tree in Pixie Hollow. Then the kids had to pin the pixie dust on the Home Tree. Right away, Olivia, one of our youngest guests, pinned her pixie dust right in the center!

After the game, all the kids sat near the Home Tree and Ella opened her gifts. I know some people don't feel that it is appropriate to open gifts at parties, but I disagree. I think that it is a great opportunity to teach your child to accept gifts graciously and demonstrate their thankfulness. Before the party, I clearly expressed how I expected Ella to act during gift time, and she did not disappoint me. We like to set up two special chairs durings gifts -- one for the Birthday kid and one for the guest giving the gift. This ensures that the gift giver gets an up close view of the unwrapping and gets to feel special too.

Next it was time for cake. Although the cake wasn't perfect (mine never are), I thought it turned out pretty darn cute.

I made a set of Fairy Houses and a dozen "mushroom" cupcakes. Thankfully, Ella loved it. (See a tutorial of the Tinker Bell & Terence Cake and Mushroom Cupcakes.)

Last but not least, we let the kids have a whack at the Acorn Pinata. Ella's classmates Dylan and Max have quite a lot of power in their bodies, so we saved them for last and let the smaller guests have a try first. Dylan did not disappoint and broke it open for us.

Unfortunately, Ella got her party bag confused with another friend's and ended up putting her loot into his bag. Vera came to the rescue though and offered some of her treats to Ella. Afterward, Ella said that Vera's generosity was her favorite part of the party. When all is said and done, the decorations, the games and the food don't matter all that much. It is the good times that we spend with those we love.

Friday, January 28, 2011

Planning An Inexpensive Tinker Bell Party


We have never had a big budget for birthday parties; however, I don't let that stop me from making a special party for my Birthday Girl. This year, Ella's party theme is Tinker Bell. Here are just a few ways that we cut costs but still are planning to create a fun memory for her:

Create our own invitations. I like to make invitations, cards and the like so I usually have a stock of plain white cardstock and invitation envelopes at my house. Then, when I need an invite or card, I just design one on the computer and use the internet to search for appropriate graphics. Personally, I love having creative control over the invite, and it is worth it to me to take the time to make them on my own. Because I already have the supplies at home, it is also very cheap for me to do. I figured it out once to cost about $0.15 each to make them. However, if you need to buy all the supplies and don't plan on using the extras for another purpose, it makes more financial sense just to buy the pre-made kind.

Mix and match paper goods. I can still remember my 5th Birthday Party. One of the things that excited me the most was that my mom had purchased decorated "Super Heroes" plates. So, it was no surprise to me that Ella wanted Tinker Bell paper goods. Personally, I don't like my party table looking like a Disney Animator threw up all over it...and buying all the "coordinated" items is not the most cost effective way to go. It seems as is if most "designer" party supplies cost about $3 per package of 8 items. If you've got more than 8 guests (like we do), then you have to buy multiples and that adds up very quickly. This year Ella and I compromised -- we purchased just the Tinker Bell napkins and then chose pink and yellow cups, plates and tablecloths. We got what we needed at just a fraction of the cost.

Search online for decorations. I hit the jackpot with this theme. Disney has a HUGE amount of free "fairy" stuff online at http://www.pixiehollow.com/. I made a cool Birthday Banner using the First Flight Garland pdf and some wall decorations by cutting out the flowers from this Arrival Day PDF.

Search online for craft ideas. Disney also has some great craft ideas as well. We're going to make Rosetta Frames that will practically be free. We collected the needed twigs from a local park and used some cheap green yarn.

Make our own pinata. A storebought pinata usually costs at least $15 but you can usually make them for practically free using household supplies. Check out how I made our Acorn Pinata for the Tinker Bell party.

Make our own cake. My girls love to peruse the "cake book" at the grocery store. But, I just can justify spending $25-40 on a storebought cake when I can make my own for less than $5. With the right tools and imagination, I can make a cool enough one to please my girls. Lucie loved her Princess Cake this year, and Ella has loved her Fancy Nancy Explorer Extraordinaire Cake and Castle Cake in past years. If you need inspiration, check out Fishmama's cake ebooks - Pretty.Cool.Cakes. and More Cool Cakes. I'm going to use these cool pans to create a Tinker Bell house that looks similar to this Fairy House Ornament craft.

UPDATE 1/31/11: The party was a huge success! Check out exactly how we celebrated Ella's 6th Birthday in Pixie Hollow.
----------------------------------
For other money-saving ideas, be sure to check out Frugal Friday at Life As Mom.

Thursday, January 27, 2011

Bonnie's Birdhouse Cake

January is a busy month for birthdays around these parts. My mother-in-law Bonnie was in town recently so we had a belated celebration for her. My father-in-law has always loved birds, however, Bonnie has taken an interest in them as well in the past year. Their backyard is filled with various kinds of birdfeeders. So, I decided to make a Birdhouse Cake this year. I was inspired by the shape of Fishmama's Tangled Cake
Although it was far from perfect, I thought it turned out pretty cute. If there is a bird-lover in your life, they just might enjoy one of these too. Here's how I did it:

What you need:
What to do:
  1. Divide the cake batter between the greased mini-pans and round cake pan. Bake according to package directions. Remove from pans and cool completely.
  2. Place the large round cake on a cake board or platter. Put enough frosting to coat it in a separate bowl and tint it brown either with cocoa powder or brown paste food coloring. Frost cake. Sprinkle with green sprinkles and let harden in the fridge for a few minutes.
  3. Build the birdhouse by placing one mini cake in the center of the large cake, adding a layer of frosting and stacking another mini cake.  Repeat until all layers are used. Skewer a straw or chopstick through the center of the cake tower for stability. Coat the "birdhouse" with a crumb coat of frosting and let harden in the fridge.
  4. Tint a small amount of the frosting with black paste food coloring for the birdhouse "hole" and tint the rest the color of your birdhouse (I used yellow). Frost your birdhouse tower and then add a black circle for the entrance. Cut off a piece of straw to use as the perch, and insert it below the black hole.
  5. Create a cone out of colored cardstock to use as your roof.
  6. Print out a picture of a bird, cut it out and tape it to a toothpick. Insert somewhere in your cake.
--------------------------------
For other birthday cake ideas, be sure to check out Fishmama's Birthday Cake Round-Up at Life As Mom. She also has some great cake ebooks -- Petty.Cool.Cakes and the newly released More Cool Cakes.

Wednesday, January 26, 2011

Happy 6th Birthday Ella!

Today is a special day! Ella turns 6 today. Oh my, how my baby has grown!


Since she is going to be having a party this weekend, we're keeping things low key but still trying to make it different from just any ordinary day. We headed out early this morning to stop for a muffin at a coffeeshop before school. After school, we're going to head out of town for lunch and a bit of shopping for Ella's party. Then later tonight we're going to have Chicken Scampi (her choice) at home. I confess, since I'm planning on a cool cake for her party, I'm not making her one tonight. I went the easy route and bought a small chocolate Pepperidge Farm cake from the grocery store. As a mom, sometimes you just have to take shortcuts for sanity.

Happy Birthday Ella!

Tuesday, January 25, 2011

How to Make An Acorn Pinata

We are entering the final stretch of Birthday Season! Ella will be having a Tinker Bell themed birthday party this Saturday. One of the things that we like to do at parties is to have a pinata for the kids to bust open. However, purchasing a ready-made one usually costs $15-25. Personally, I don't want to spend $15 on something that will just be smashed to pieces. Instead, I make my own for virtually nothing. Yes, it does take more time but I like saving money and having creative control over the pinata. Typically, I try to chose something that would be appropriate to smash up. There is just something that disturbs me about smashing up a princess-shaped pinata.

Two years ago, I attempted my first pinata. Ella was having a Castle Party so I crafted a dragon pinata for the party-goers to slay.

This year, I decided to make an acorn to go with the Pixie Hollow theme. If you watch the recent Tinker Bell movie, you'll notice that the "tinker" fairies use acorns to create things like pots. Things of nature are prominently featured in the world of Pixie Hollow. Since a balloon is shaped similarly to an acorn, I thought it would be an easy shape to accomplish.

Here's how I did it...

What you need:

  • A batch of papier-mâché paste (about half of this recipe would have been more than sufficient)
  • About 3 2-page spreads of newspaper, some colored sheets and some plain black/white
  • Inflated balloon
  • Bowl
  • Yarn
  • Toilet Paper Roll
  • Brown Paint
  • Large Brown Paper Bag
  • Scissors
  • Tape
  • Glue or double-sided tape
  • Glitter (optional)
Mix up a batch of papier-mâché paste and allow to cool.

Tear newspaper into strips about 1 to 1 1/2 inches wide. I alternated the color of newsprint on each layer to make sure that the areas had been covered sufficiently (ie. first layer black/white, second layer colored ads or comics, third layer black/white).

Place your inflated balloon on a bowl to hold it steady. Dip strips of newsprint into paste and smooth onto balloon until covered. Let this first layer dry -- putting it out in the sun will help this go much faster.

Apply a second layer (in a different color of newsprint) onto the balloon. Allow to dry.

Take a long length of yard and place the midpoint at the bottom (tied end) of the balloon. Run it along the sides and up to the top of the balloon and tie. Tape the yarn in a few places to secure it if necessary. Repeat on the other side of the balloon. This yarn will be what you use to suspend the pinata.

Apply a third layer and make sure to cover up the yarn. Allow to dry.

Cut a 2-inch hole on one side near the top of the pinata. Remove the broken balloon bits. This will be where you fill the pinata with candy. (Alternatively, you could create your pinata with a hole in it to begin with by leaving a portion of the balloon uncovered.)

Cut the cardboard toilet paper roll in half. This will become the acorn's stem. Run the yarn through the roll and secure the roll to the top of the pinata with tape.

Paint the entire pinata and "stem" with brown paint to resemble an acorn. Let dry.

Cut the paper bag into small oval shapes. (I used my Creative Memories Oval cutter which made it a snap!) If you wish, you can apply some glue and glitter around the edges of the ovals. Starting about 1/3 from the top of the pinata, apply the ovals in slightly overlapping rows until you reach the top of the pinata. Be sure to fill the pinata with treats before you cover up the hold with brown ovals.

------------------------------
For other money-saving ideas, be sure to check out Frugal Friday at Life as Mom.

Monday, January 10, 2011

Planning the Last Birthday Party of the Season


Now that Lucie's 3rd Birthday is behind us, I have just one more event in Birthday Season 2011-2011. Once we get past Ella's birthday in a couple of weeks, I'm off the hook for the next ten months! Overall, it has been pretty manageable, and I hope to keep it that way!

When Ella started preschool, we started throwing her traditional "friend" birthday parties because she actually had "friends" in the plural sense. Plus, in my opinion, a two or three-year old really doesn't care too much about a big party. If you give them a cake, they're happy. (See case in point.) But, a four-year old who is in preschool? Oh man, are birthday parties exciting to them! Ella chose a Castle Party for her 4th Birthday and a Fancy Nancy Explorer Extraordinaire Party for her 5th. They were so much fun and gave her so much joy.

This past weekend, we started planning her 6th Birthday Party. On Saturday morning, I printed out this nifty little Birthday Planning Page from FishMama, and we sat down to work. Ever since we checked out Tinker Bell from the library, Ella has loved Tinker Bell and the world of fairies. So, Ella will be having a Pixie Hollow Birthday, and I'm so excited about the possibilities! Stay tuned for more details...and possibly a cake and pinata tutorial.

Monday, December 06, 2010

Happy Birthday

Today we celebrate...
the sweet baby who came home from the hospital in a stocking...

who grew a darling boy who learned early on to help with house work...


who matured into a entertaining teenager that I knew (but did not love...yet)

who became the man I married...


who became a wonderful father.

Happy Birthday Brett! We love you!

Thursday, January 28, 2010

Fancy Nancy Explorer Extraordinaire Cake


Last year, we were introduced to Fancy Nancy at Ella's Castle Birthday Party. Two of Ella's friends thought that the Fancy Nancy books were just right for her! Nancy is a girl who LOVES to dress up and be fancy...just like my Ella. And funnily enough, Nancy's mom is NOT fancy...and usually, neither am I. So, it wasn't a surprise when Ella said that she wanted a Fancy Nancy Birthday Party this year.

There are several Fancy Nancy books out there, but we chose to find our inspiration in Fancy Nancy Explorer Extraordinaire!

To make this cake, I used:

Once the cakes and frosting were prepared, I took about 1/2 cup of the frosting and dyed it hot pink with the food coloring. I placed leveled off one cake round and placed it cut-side down on the cardboard, spread the top with pink frosting and then topped it with the other cake round.
I dyed the remaining frosting bright green and spread a light "crumb coat" over the cake, and then chilled it for about 10 minutes. While it chilled, I made the "grass" by mixing a teaspoon of water and a few drops of green food coloring in a ziploc baggie. Then, I added some shredded coconut and mixed it together until the coconut was green. When the crumb coat on the cake was set, I put a thicker, swirling coat of frosting on. I created a "path" and "planter mound" with the graham cracker crumbs and trimmed the edges with snowflake "flowers". I added the coconut grass on the green frosting and added some green sugar decorating crystals for extra pizzazz. Then, to finish it off, I added Bree and Nancy to the path and the #5 Candle in the mound.


Voila! A Fancy Nancy Explorer Extraordinaire Cake! (Forgive the flash...it makes the cake appear far more yellow than it did in real-life and harder to see the grass!)
If you're looking for other cake ideas, be sure to stop by Life As Mom for Ultimate Recipe Swap and the Birthday Cake Round-Up!

Tuesday, January 26, 2010

Happy Birthday to Ella!

Five years ago, this was the little sweetness that I was holding in my arms for the first time:

Yes, today is Ella's FIFTH birthday...and my "Momma-versary" as well. Although by this time of evening five years ago, Ella was about fourteen hours old and was still without a name. My brother-in-law Troy took this photo after he and his wife Aimee drove up after work (and visiting hours) to meet their new little niece. After 24 hours of labor and very little rest during the day, I was more than happy to hand her off so that they could fawn over her and so that I could watch Alias, my favorite TV show. I even remember that the episode was "Liberty Village" if you can believe that one.


Although Ella is now five, she will always be my baby. Happy Birthday Ella!

Wednesday, January 28, 2009

The Castle Cake


While my cakes are nothing compared to FishMama, I am trying to making them good enough to impress a 4-year old. Well, I think Ella was pleased the other day with her castle cake. It was relatively easy to make. I used a standard white cake mix and made some white frosting. I got compliments on the frosting and confessed to them that it was just the recipe off of the C & H Powdered Sugar box! I've tried various other homemade (and complicated!) frosting recipes in the past, but I like this one the best. Plus, it takes only a few minutes to make it in my trusty KitchenAid mixer. Can't beat that!

To make the cake, I used a 9-inch round pan and 2 mini Springform pans. I cut the domed part off of the large cake so that I would have a flat surface to stack the "tower" formed from the mini cakes. I ended up cutting the domed part off of one small cake as well so that the tower would be stable. I placed the large cake on a cardboard base, frosted it and then stacked the mini-cakes with a layer of frosting between them. To add stability, I placed a skewer through the center of the three cakes. Then, I completely frosted the cakes.

To decorate the cake, I made the "walls" with some white cardstock cut to look like a wall. I had to tape strips of cardstock together to make a large enough wall. For the top wall, I hot glued some felt flags to add color. Then to finish it off, I made a cone out of yellow paper and added a toothpick with a felt flag. If the cake had been larger, I think that I would have tried to add the plastic Queen & King onto the cake. But, they were a little too wide to fit on the first layer of the cake.

In retrospect, I might have dyed some frosting to paint doors/windows and added a drawbridge. But, I ran out of time and decided to keep it simple and hope that Ella would like it as-is. She did and that is all that matters!

If you're looking for more birthday cake ideas, be sure to visit FishMama's Birthday Cake Round-Up tomorrow morning!

5-minute Buttercream Frosting Recipe

1 lb box powdered sugar
1/4 cup milk
1 teaspoon vanilla extract (I use Watkins Orginal Double-Strength Vanilla)
1 stick salted butter (softened)

Beat ingredients with an electric mixer for 2 minutes, scraping bowl often. For thinner consistency, add more milk a little at a time. Frosts one 8-inch, 2-layer cake.

Tuesday, January 27, 2009

Ella's Castle Party

Yesterday, Ella turned FOUR, and we celebrated with a "Castle Party." Since Ella (and her friends) have so much energy, I decided to keep the invite list small for my sanity -- Vera and Caleb (Ella's best friends from preschool), our friend Caleb from Santa Barbara, and Baby Olivia. Well, I guess technically it wasn't that small when you add the mommies and little siblings. But, it turned out to be lots of fun.

Over the past week, I busied myself making costumes (capes and crowns for all, necklaces for the princesses, and tunics for the princes), a dragon pinata, a castle cake and planning a couple of games. Early into the party, I realized that all of this was not necessary. The kids just loved being together -- they would have had just as much fun running around for two hours without all the extras. But, I think the extras were fun...and hopefully it made the day just a little bit more special for Ella. Here's a picture of Lucie with one of the crowns on -- that didn't even last 5 seconds. She didn't enjoy the crown...but her friend Olivia did.


Originally, the kids didn't really want to wear the capes. But, once we headed outside for Pinata Time it was a different story! It was a bit on the chilly side in our backyard so they costumes helped with the cold a bit. Here is a photo of Caleb (the Elder) and Vera as they waited in the cold for their turn in "slaying the dragon".


Yes, I actually made a dragon pinata. I just couldn't bring myself to spend $15 on something that the kids would just hack to pieces anyway. So, I decided to make mine after I saw these directions on the internet. Ella was a bit hesitant to smash the pinata...and Lucie cried when we started hitting it. But "The Two Calebs" had great fun whacking it! Unfortunately, either my pinata was too sturdy or our banging stick was too weak -- the thing wouldn't break! So, we decided to just stab it and shake all of the candy out.


We played two simple games -- Find the Royal Treasure and Pin the Flame on the Dragon. For the treasure hunt, I made gold "coins" out of paper and hid them in the back yard. After telling the kids that the dragon had stolen the royal treasure, I sent them out there to find them. As a prize, they each got a little pouch of chocolate coins. (I didn't use the chocolate in the hunt since I wasn't sure if it was going to rain and didn't want to hide chocolate in my living room where babies could find it!) Pin the Flame on the Dragon was very cute -- a first for most of the kids, I think. Afterwards, Vera insisted that we put the flames in the proper place so that they were all coming out of the dragon's mouth.

Towards the end of the party, we enjoyed some Castle Cake and Ella got open her gifts. Here's Ella with Olivia and also with Caleb (the younger).


Thanks to the generosity of her friends, she has some Fancy Nancy & Belle books, a feather boa, a tiara and a Barbie doll with some cool furniture. It was a lovely time - I hope our friends enjoyed it too.

If you're interested in how to make a castle cake, come back tomorrow for my post about the cake!

Monday, January 26, 2009

Happy Birthday Ella!


Today is the day! It was FOUR years ago today that I became a mother when my sweet Ella Rose was born. (You can read about that story here.) We're headed out to dinner to our favorite restaurant right now. Come back tomorrow to hear about Ella's Birthday party!