Showing posts with label Organization. Show all posts

Friday, August 10, 2012

Getting Ready for the New (School) Year

The new year is almost here! Well, the new year in my mind anyway. My parents were teachers. My husband was a teacher and is now a law student. So for me, my life revolves around the school year. It's a time when I naturally start to reflect on the past year, what needs to be done this year, and any changes that I need to make. And right now, the new year is nearly upon me!

Although Brett starts back at school in two weeks and the girls in three weeks, I'm slowly shifting gears and trying to figure out what the Fall is going to look like for us as a family. I know I'm going to be busy with running our household, working part-time, blogging, creating crafts for DIY Your Way, and volunteering at the elementary school and with my MOPS group. I know that things will get very busy, very quickly. So, I'm thinking through lots of things to get focused and organized now so that I can hit the ground running.

As I've gotten older, I've realized something about myself. I like to be organized, and I am a bit of a perfectionist. This combo causes some problems for me. All too often, I put off organizing something because I want it to be perfect and I don't have time to make it perfect. So, I end up with partially completed lists and tasks undone. In other words, um, things can get a bit chaotic. I just know that once classes start up, I'm going to feel behind if I don't get things organized now. Here's what I'm mulling over these days:


Simplify for Fall Challenge at Life Your Way - This is one of those things that seems a bit daunting to me -- a full week of organizing my home! I'm not sure that I can realistically do this...certainly not in the way that the perfectionist personality in me would want to. But, I've gotta start somewhere, right? I know that if our house is tidier it makes things easier on all of us. So, I'm going to give it a go and see where I end up. The challenge starts on the 20th, but before then, I'm going to think through and analyze what my trouble spots are in the challenge areas:
  • Clothes / Laundry
  • Kitchen / Meal Planning
  • Toys / School Supplies
  • Bedrooms & Bathrooms
  • Paper Clutter & Budget
  • Routines / Schedules


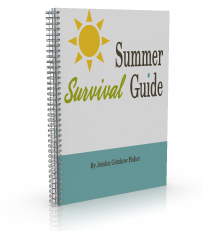
Organizing Life as MOM - I'm also going to put together a household notebook for myself this year. My sister Jessica at Life as MOM offers a super resource to get the job done. Jessica is in the final stages of revamping Organizing Life as MOM for the new school year, and it should be available soon. (Stay tuned for more details!) She's even going to offer it in a half-page size this year! Since my kids are in public school, I'm out and about a bit more. So, I really am looking forward to making a half-size version that I can keep with my in my purse. I think it will make my life much easier.

So, that's my plan, and hopefully, I'll be sticking to it. I just gotta keep those perfectionist tendencies from derailing my progress!

Thursday, May 31, 2012

The Summer Survival Guide

Okay, I'm trying not to freak out that summer is nearly here. Lu finished preschool on Tuesday, and Ella is set to finish in just a couple short weeks. Don't get me wrong, I'm excited to have them home for the summer. But, I'm also just a tad overwhelmed as well. Now that we're living the life of a law school family, I'm working from home as a virtual assistant for bloggers and blog contributor to supplement our income (aka school loans). Somehow, I've got to figure out how to juggle that along with having two kiddos at home full-time. I know that they will become bored and bicker if I don't have something up my sleeve. One of my solutions? The Summer Survival Guide!


Last year, my big sister Jessica published this awesome ebook full of summertime inspiration for planning family fun. It includes printables and customizable pages as well as ideas for home management, emergency preparedness and more.


As someone who has personally read every one of the 200+ pages in this book, I can confidently say that it is worth every penny of its $9 price! If you're interested in learning more about the book, click on the link above. You can even view the Table of Contents as well as a sample to see if it is right for you and your family.

Last summer, we were in the midst of remodeling our condo, and packing up for a cross-country move. Sadly, we weren't able to plan much summer fun into our lives. This summer is going to be different with the Summer Survival Guide!

Tuesday, June 28, 2011

Pink-Washed Toy Crates


A few months ago, my husband gave me two wooden crates as part of my 10 days of anniversary gifts. They were symbols of the year of marriage when several family members and friends moved away AND of our impending move for law school. Initially, I wasn't sure what I was going to do with them since I didn't really have a place to store two wooden crates. Then, I realized that they fit perfectly underneath the girls' Stork Craft Caribou Bunk Bed! What a perfect way to store some of their toys in a very child-friendly and good looking way.


Of course, I couldn't just leave them as unfinished wood. Not only isn't that "princessy" enough, the wood is kinda rough and just might give my girlies some splinters. Since the crates are going to be used by children, I thought a more distressed finish might be in order. Then I won't have to worry about if they ding them up. Judging by the looks of their bunkbed now, they WILL ding them up. So, I went for a white-washed look. Scratch that. Pink-washed look.


Here's what I used:
  • wooden crate ($10 regular price at Michael's - only $6 with 40% coupon!)
  • sandpaper
  • polyurethane
  • paint (I used a $5 "Daddy's Little Girl" Paint Pod from Ace Hardware)
  • water
  • paintbrush
  • glides
I am no professional, but here's how I did it:
  1. I smoothed out the wooden crates with a quick sanding and then removed the dust with a damp paper towel.
  2. I decided to put a coat of poly on first to seal the wood. This would also bring out the natural color of the wood in the areas where the paint was thin. Not sure if this is exactly necessary, but it's what I did. (In retrospect, part of me wishes that I had stained the wood dark brown first. The other part of me realizes that the crates were enough work as it was.)
  3. In a disposable cup, I mixed a small amount of paint with an equal amount of water. I brushed this on the crate and let it dry. This gave the crate a see-through pink coating. Wood knots were still visible.
  4. Once that was dry, I dry-brushed some pink paint on. To do this, I dipped a dry paint brush in the paint and blotted most of the paint off onto a paper towel. Then, I lightly brushed it onto the crate for a streaky effect. I let it dry and then repeated until I got the look I wanted.
  5. To finish it off, I put a coat of non-yellowing polyurethane to seal it all up and make it easier to wipe clean. Because with kids, everything needs to be able to wiped clean easily.
  6. To make the crate easier to slide underneath the bed, we attached some cheap glides on the bottom corners of the crate.

To make it easy for the girls to tell the contents of the crates, I made some little labels out of scrapbooking paper. I made sure to use words as well as pictures for my non-reader Lucie.

For other how-to ideas, stop by The Lettered Cottage for "How To's Day" on the last Tuesday of the month.

    Monday, April 11, 2011

    Moving Monday: Tackling the Desk

    Two weeks ago, I made a pledge to myself to choose one area of my house to clean/organize/dejunk. I started by making some changes to our laundry system (aka, the pile of dirty clothes in my master closet). Then, my plans got a little derailed by the addition of an Amazon Kindle to my life. I've decided that I'm going to have to reward myself with reading time after I accomplish the important tasks ahead of me. Lately, I've been tackling my desk.

    My desk has always been a struggle for me to keep clean and organized. I have a tendency to pile things until my desk looks as if it is home to the leaning tower of Pisa. Its nearly constant state of disorganization is something that I know drives my husband nuts. Once I became a stay-at-home-mom, I tried to organize it. I bought a spiffy red leather-like desktop organizer with a little drawer. It was cute...but it was for horizontal storage. Houseworks clued me into the beauty of vertical, rather than horizontal, desk storage. So, as cute as the organizer was, it just wasn't effective for me. Since my desk doesn't have a file drawer, I needed a desktop file. I picked up a Snap-N-Store Desktop File and matching magazine file from Staples.

    To help organize my space, I:
    • Created new file folders: I went through the stacks of paper on my desk and made new file folders for the types of items that I wanted to keep on my desk. I used my spiffy Brother Label Maker to make neat file labels and satisfy the perfectionist in me. Now that it is clear where things go on my desk, I won't have to hunt for stamps or bills and neither will my husband.
    • Cleared out the desk drawers of non-essentials: Awhile ago, I thought it was a great idea to store some craft materials in one of my three small desk drawers. Guess what? Not a good idea. I don't craft at my desk, so they were really just taking up precious desk real estate. So, out they went and into the craft cupboard. Instead I've filled the drawers with necessities like envelopes, pens, notepads, etc. Now I won't be frustrated when I try to mail a bill and can't find an envelope.
    • Cleared the desktop of non-essentials: Somehow if something doesn't have a home, it ends up on my desktop. So, our Flip Video Camera and Canon Powershot Digital Elph camera have resided there. Once I cleared out the drawers of the unnecessary, I found our electronics a new home in one of the drawers. Hallelujah!
    • Cleaned out the pen cup: My pen cup somehow always manages to fill with pens that don't work and pencils that aren't sharpened. So, I filled it with pens that work and mechanical pencils.
    My, oh my, does it feel good to have an organized desk! I just might reward myself with a book on my Kindle.

    Monday, March 28, 2011

    Moving Monday: Gearing up to Move

    It appears as if the uncertainty of our plans in the Fall and possible impending move is weighing a bit on me. I have so much to do, to get rid of, and to organize that it overwhelms me at times. What am I saying?! It overwhelms me on a daily basis. I am so busy caring for two young girls, working a part-time job, and managing the house and our finances that I have a hard time even thinking about what to do to get ready for a move. And yet I know that if I don't start now, I am going to be seriously stressed out this summer.

    So, I've decided that now is the time for action. Now is the time to get organized. Now is the time to start downsizing and deciding what will be moving with us. To keep me on task, each Monday I'm going to share about what area that I'm working on to help me gear up for the move. I figure that by blogging about it, I'll hopefully stay on track and maybe even help someone else out there that struggles in the same ways that I do.

    This past week, I realized that one area that I struggle in is the laundry. There is no getting around it. We need clean clothes. With four people in our house, the laundry can get out of hand quickly. I've heard my sister sing the praises of doing a daily load, but I've never quite managed that. To do a daily load, I need it to be quick and easy so that I actually do it. My "laundry system" just hasn't been really conducive to that. We are not fortunate enough to have a laundry room in our condo. Instead, our washer and dryer are in the garage, and our dirty laundry collects in a large laundry basket in my walk-in closet. More often than not, the dirty laundry overflows and spills onto the floor. Then, when it is time to wash the laundry, I sort it in several piles that litter my bedroom floor for the day. If I were to do a daily load, I'd still have to sort through the huge pile to come up with a load to wash.

    This past weekend, I decided that I needed to change our system. We needed a laundry sorter! It would help me sort throughout the week and quickly see when there was a full load ready to be washed. Revolutionary, I know. Since we don't have a laundry room and our bathrooms aren't that large, it just never occured to me to get one.

    I searched online at Target and  discovered this beautiful seagrass triple laundry sorter for $100. (I also found it today for $70 at Amazon.) Honestly, I just couldn't justify spending that much on something to hold my laundry. Someday, maybe. Today, no. Yesterday we went to Walmart, and I found a 4-bag laundry sorter for only $29. Hey, four bags are better than three right?

    It has removable bags with handles, so that I can just lift out a full load to be washed and take it to the garage with me. It also has wheels so that I can wheel the entire sorter into the kitchen (near our garage) if I want to do a marathon cleaning session.

    No, I won't be able to store it out in the open like the seagrass one, but it is a workable solution for our closet.

    It's already working...I've got my daily load in the wash right now!